上一节,小试牛刀,如何创建第一个SpringBoot例子。
下面进行讲解SpringBoot的IOC思想。在SpringBoot出来之前,SSM(Spring+Spring MVC+MyBatis)比较流行。
那么SpringBoot与SSM对比,核心优势在哪里?
答案就是能自动配置
Springboot的出现,实现了OCP[开闭原则]-->IOC[控制反转]。下面引入文章,如何理解从OCP到IOC的过程
SpringBoot的IOC思想跟文章类似:Interface+工厂模式+容器实例化+容器自动注入到代码块中。
因此SpringBoot的目的:抽象编程,把控制权交给用户;实现灵活的OCP【开闭原则】
菜单
下面我们将探讨SpringBoot如何把对象加入到容器中
SpringBoot把对象加入到容器的常用三种方法:
- XML形式(使用不多)
- 注解形式(常用)
- 编程形式(使用不多)
下面主要讲解注解形式的注入方式,其中注解注入常用的是模式注解注入容器。
模式注解主要是一下四种
- @Component[基础注解,把类/bean注入容器]
- @Service [表明是服务]
- @Controller [表明是控制器]
- @Repository [表明是仓储,访问数据库]
- @Configuration
其中@Service、@Controller、@Repository都是基于@Component注入。
@Configuration常用于写框架
demo1:简单的依赖注入例子
1.1、新建一个Diana的类并自动加入容器中
新建package,命名为sample/hero。在下面创建Diana类
package com.fcors.fcors.sample.hero;

import org.springframework.stereotype.Component;

@Component
public class Diana {
    public void q(){ System.out.println("Diana Q");  }
    public void w(){
        System.out.println("Diana W");
    }
}
1.2、在具体的方法中,使用依赖注入
依赖注入主要分成三种
- 属性注入
- 构造注入
- 代码注入
依赖注入的统一规则都是在前面加:@Autowired
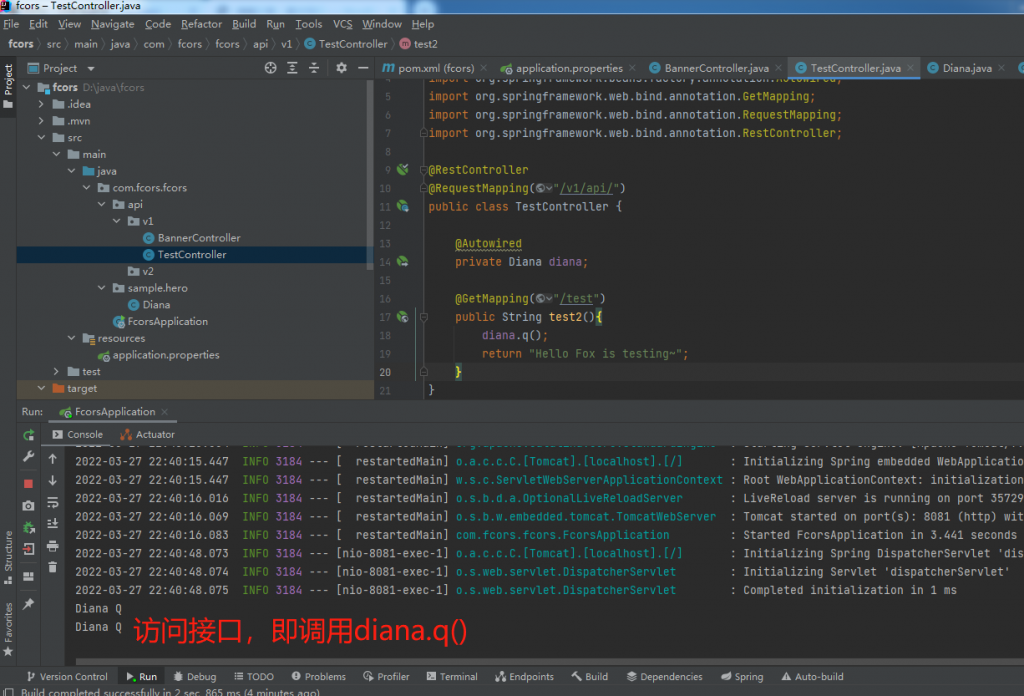
1.2.1属性注入的方式
package com.fcors.fcors.api.v1;

import com.fcors.fcors.sample.hero.Diana;
import org.springframework.beans.factory.annotation.Autowired;
import org.springframework.web.bind.annotation.GetMapping;
import org.springframework.web.bind.annotation.RequestMapping;
import org.springframework.web.bind.annotation.RestController;

@RestController
@RequestMapping("/v1/api/")
public class TestController {

    @Autowired
    private Diana diana;

    @GetMapping("/test")
    public String test2(){
        diana.q();
        return "Hello Fox is testing~";
    }
}
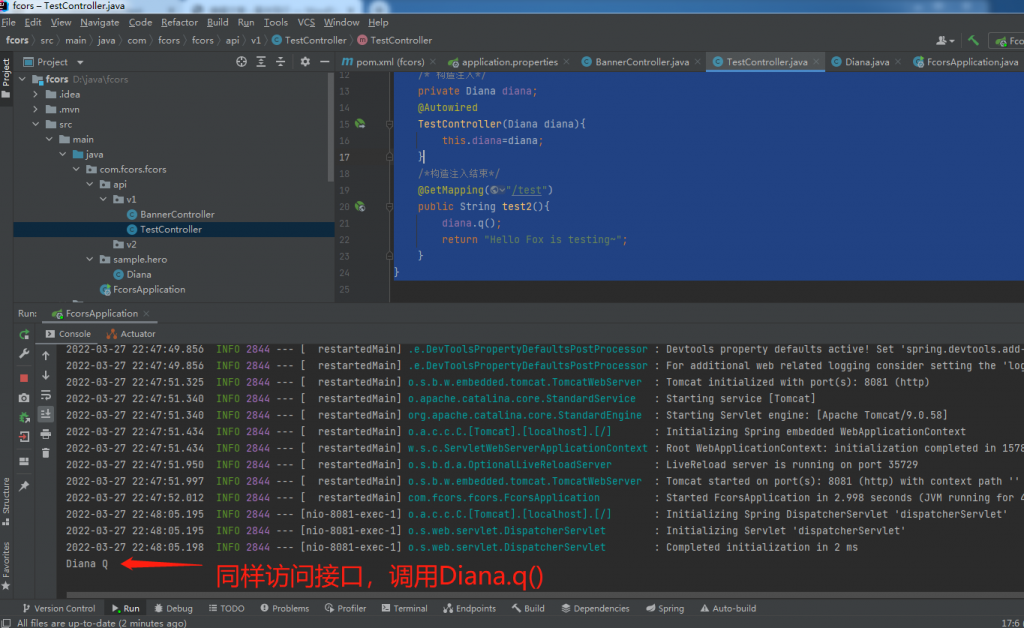
1.2.3、构造注入(推荐方式)
package com.fcors.fcors.api.v1;

import com.fcors.fcors.sample.hero.Diana;
import org.springframework.beans.factory.annotation.Autowired;
import org.springframework.web.bind.annotation.GetMapping;
import org.springframework.web.bind.annotation.RequestMapping;
import org.springframework.web.bind.annotation.RestController;

@RestController
@RequestMapping("/v1/api/")
public class TestController {
    /* 构造注入*/
    private Diana diana;
    @Autowired
    TestController(Diana diana){
        this.diana=diana;
    }
    /*构造注入结束*/
    @GetMapping("/test")
    public String test2(){
        diana.q();
        return "Hello Fox is testing~";
    }
}
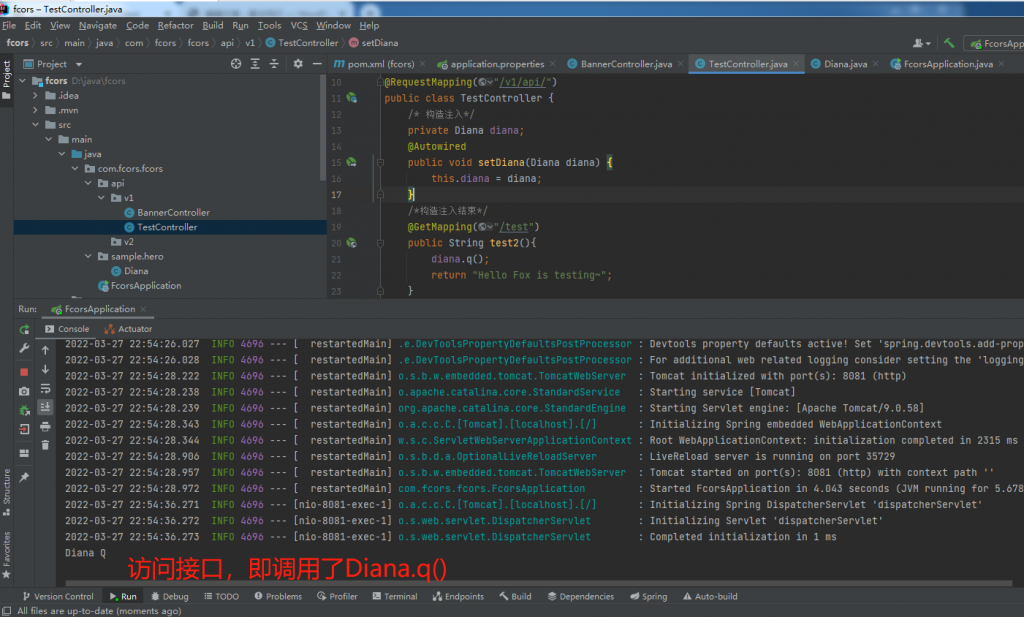
1.2.3、代码注入


package com.fcors.fcors.api.v1;

import com.fcors.fcors.sample.hero.Diana;
import org.springframework.beans.factory.annotation.Autowired;
import org.springframework.web.bind.annotation.GetMapping;
import org.springframework.web.bind.annotation.RequestMapping;
import org.springframework.web.bind.annotation.RestController;

@RestController
@RequestMapping("/v1/api/")
public class TestController {
    /* 代码注入*/
    private Diana diana;
    @Autowired
    public void setDiana(Diana diana) {
        this.diana = diana;
    }
    /*代码注入结束*/
    @GetMapping("/test")
    public String test2(){
        diana.q();
        return "Hello Fox is testing~";
    }
}
通过demo1实验,我们可以简单地得知SpringBoot的简单IOC例子。下面我们再深入了解Bean的实例化时机。
demo2:实例化时机
默认情况下:在SpringBoot启动的时候,就开始实例化,把对象存入到容器中,并注入到代码片段中。
我们可以修改demo1中的Diana类,在该类的构造方法中加入输入提醒,即可知道什么时候该类被实例化(加入到容器中)
package com.fcors.fcors.sample.hero;

import org.springframework.stereotype.Component;

@Component
public class Diana {
    public Diana(){
        System.out.println("Diana 被实例化~");
    }
    public void q(){ System.out.println("Diana Q");  }
    public void w(){
        System.out.println("Diana W");
    }
}
此时我们重新build项目并运行,发现具体的方法未调用就输出 “Diana 被实例化”
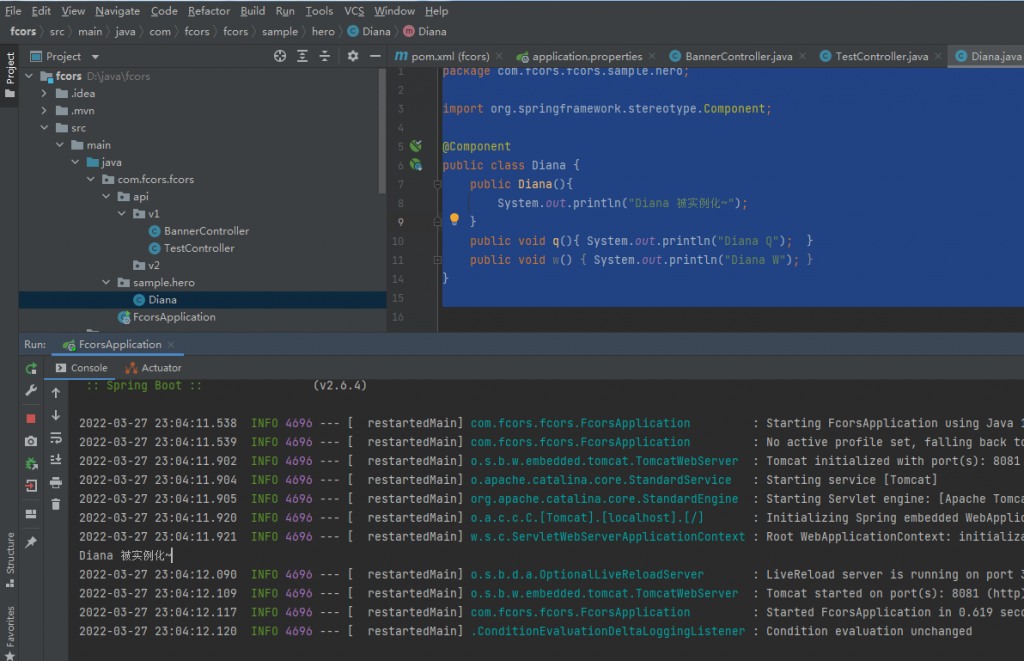
通过上述例子,证明 在SpringBoot启动的时候,就开始实例化,把对象存入到容器中。
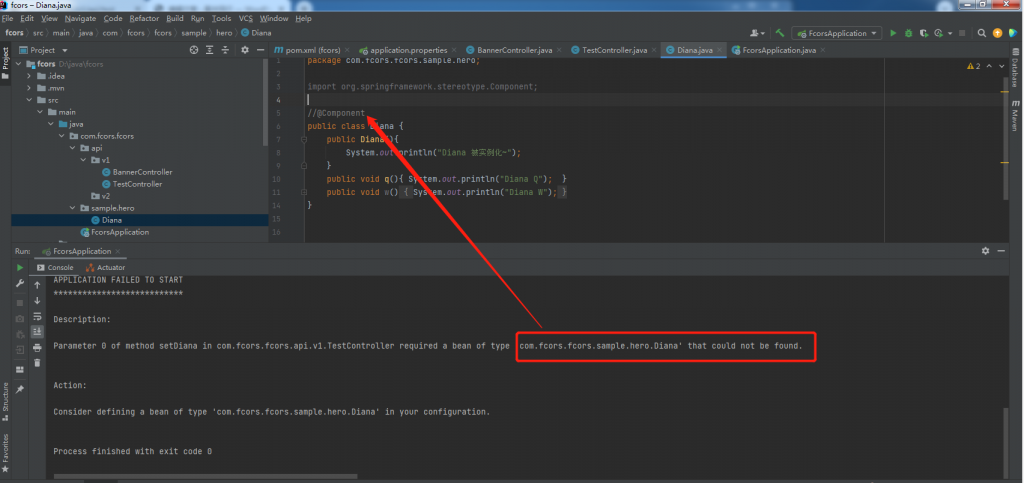
下面我们继续做实验,如果把Diana中的@Component屏蔽后,重新build&run
我们发现会报错。即代表注入也是在SpringBoot启动时进行,如图所示
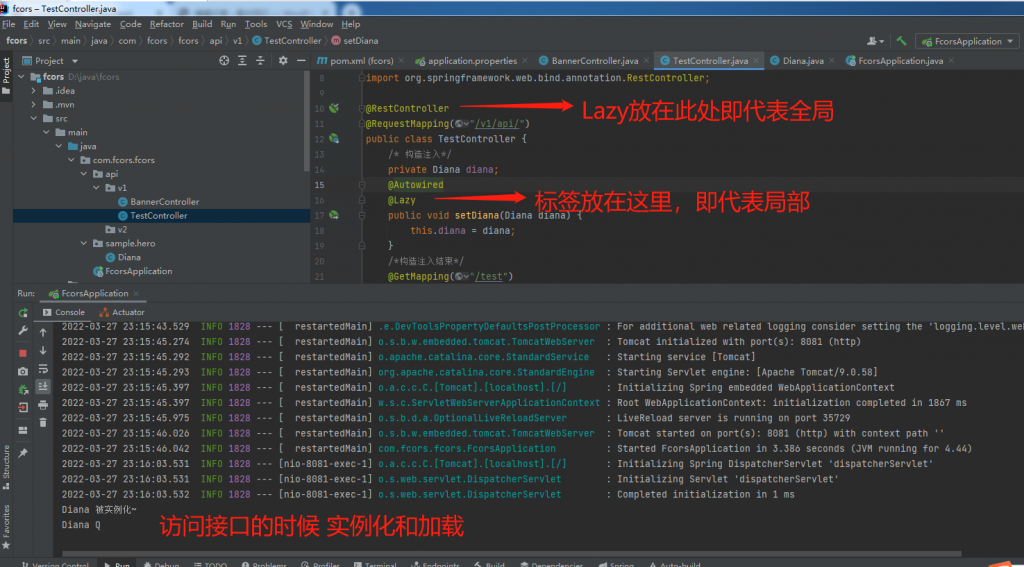
那么SpringBoot有没有办法可以延迟实例化呢?
在类和调用此类对象的地方分别加上@Lazy
Diana的内容
package com.fcors.fcors.sample.hero;

import org.springframework.context.annotation.Lazy;
import org.springframework.stereotype.Component;

@Component
@Lazy
public class Diana {
    public Diana(){
        System.out.println("Diana 被实例化~");
    }
    public void q(){ System.out.println("Diana Q");  }
    public void w(){
        System.out.println("Diana W");
    }
}
具体方法(该例子的api)代码
package com.fcors.fcors.api.v1;

import com.fcors.fcors.sample.hero.Diana;
import org.springframework.beans.factory.annotation.Autowired;
import org.springframework.context.annotation.Lazy;
import org.springframework.web.bind.annotation.GetMapping;
import org.springframework.web.bind.annotation.RequestMapping;
import org.springframework.web.bind.annotation.RestController;

@RestController
@RequestMapping("/v1/api/")
public class TestController {
    /* 构造注入*/
    private Diana diana;
    @Autowired
    @Lazy
    public void setDiana(Diana diana) {
        this.diana = diana;
    }
    /*构造注入结束*/
    @GetMapping("/test")
    public String test2(){
        diana.q();
        return "Hello Fox is testing~";
    }
}
上面的demo并没有用到IOC的控制反转,改造思路:依赖的不是类而是接口(Interface)。
日常编写代码中,我们时常会在service中定义一个类,然后在代码块中引入对象,这种编写方式就比较low,扩展性低,而且并没有使用SpringBoot的IOC思想。
demo3:引入Interface(bytype)
3.1、 sample/hero中创建一个interface(ISkill)
package com.fcors.fcors.sample;

public interface ISkill {
    void q();
    void w();
}
3.2、Diana类实现该接口
package com.fcors.fcors.sample.hero;

import com.fcors.fcors.sample.ISkill;
import org.springframework.context.annotation.Lazy;
import org.springframework.stereotype.Component;

@Component
@Lazy
public class Diana implements ISkill {
    public Diana(){
        System.out.println("Diana 被实例化~");
    }
    public void q(){ System.out.println("Diana Q");  }


    public void w(){
        System.out.println("Diana W");
    }
}
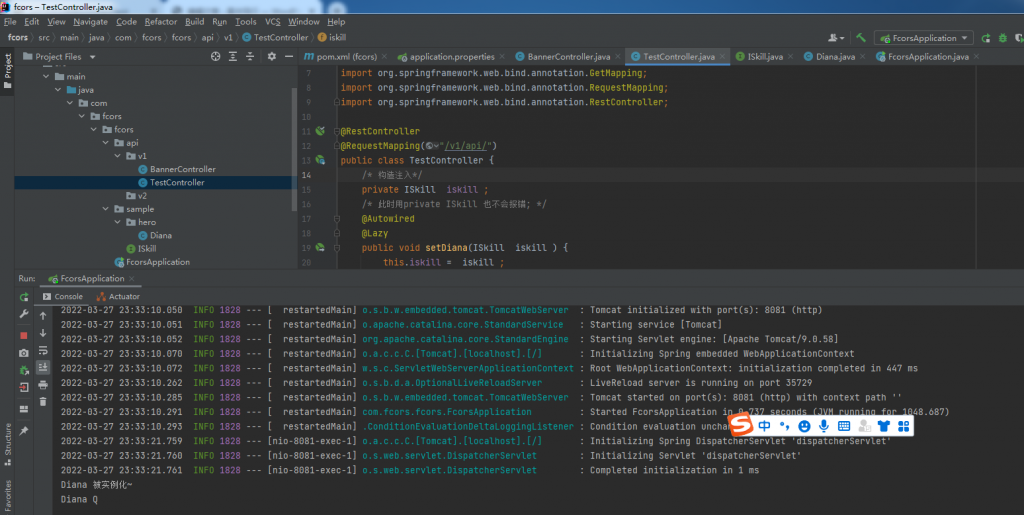
3.3、接口代码引入接口
package com.fcors.fcors.api.v1;

import com.fcors.fcors.sample.ISkill;
import com.fcors.fcors.sample.hero.Diana;
import org.springframework.beans.factory.annotation.Autowired;
import org.springframework.context.annotation.Lazy;
import org.springframework.web.bind.annotation.GetMapping;
import org.springframework.web.bind.annotation.RequestMapping;
import org.springframework.web.bind.annotation.RestController;

@RestController
@RequestMapping("/v1/api/")
public class TestController {
    /* 代码注入*/
    private ISkill  iskill ;
    /* 此时用private ISkill 也不会报错; */
    @Autowired
    @Lazy
    public void setDiana(ISkill  iskill ) {
        this.iskill =  iskill ;
    }
    /*代码注入结束*/
    @GetMapping("/test")
    public String test2(){
         iskill.q();
        return "Hello Fox is testing~";
    }
}
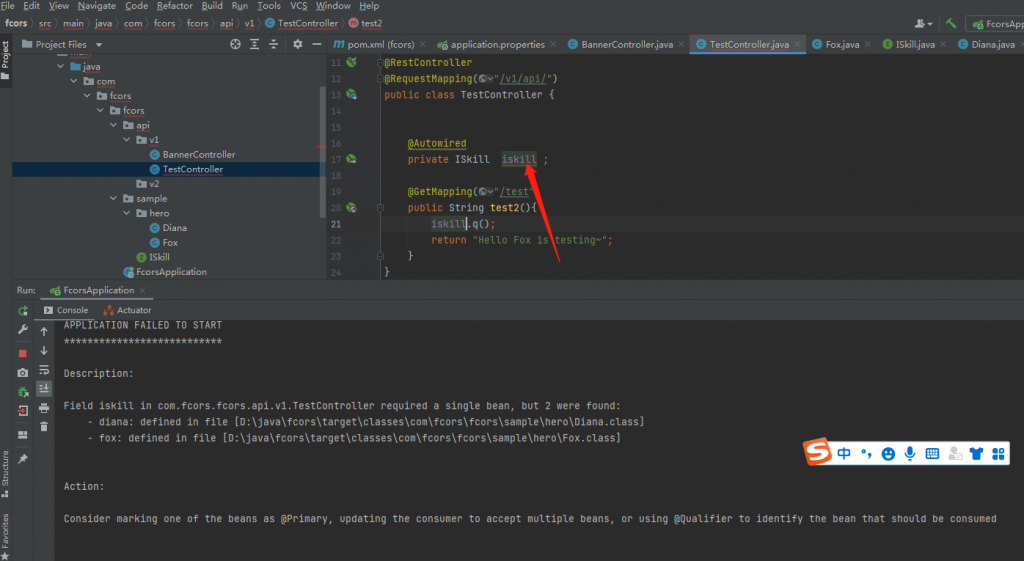
下面我们继续思考一个问题,在现实的工作中,一个接口通过都会被多种类实现,如上面的例子。在具体的方法中,”private ISkill iskill ;“这里的iskill会是哪个类?还是会报错?下面进行demo3讲解注入的顺序
demo3讲解注入的顺序
3.1、首先我们引入一个新的类并实现接口
package com.fcors.fcors.sample.hero;

import com.fcors.fcors.sample.ISkill;
import org.springframework.stereotype.Component;

@Component
public class Fox implements ISkill {
    public Fox(){
        System.out.println("fox 被实例化~");
    }
    public void q(){
        System.out.println("Fox Q");
    }
    public void w(){
        System.out.println("Fox W");
    }
}
此时我们运行项目,结果会报错
那么我们如果修改这个注入呢?
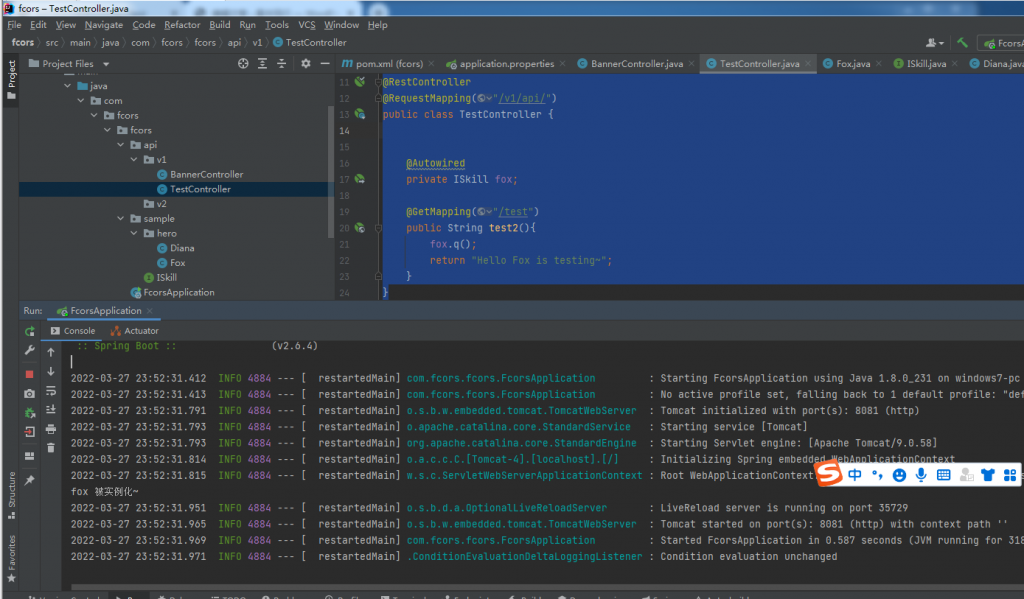
3.2.1、方法一:在注入的时候通过名字指引
package com.fcors.fcors.api.v1;

import com.fcors.fcors.sample.ISkill;
import com.fcors.fcors.sample.hero.Diana;
import org.springframework.beans.factory.annotation.Autowired;
import org.springframework.context.annotation.Lazy;
import org.springframework.web.bind.annotation.GetMapping;
import org.springframework.web.bind.annotation.RequestMapping;
import org.springframework.web.bind.annotation.RestController;

@RestController
@RequestMapping("/v1/api/")
public class TestController {


    @Autowired
    private ISkill fox;

    @GetMapping("/test")
    public String test2(){
        fox.q();
        return "Hello Fox is testing~";
    }
}
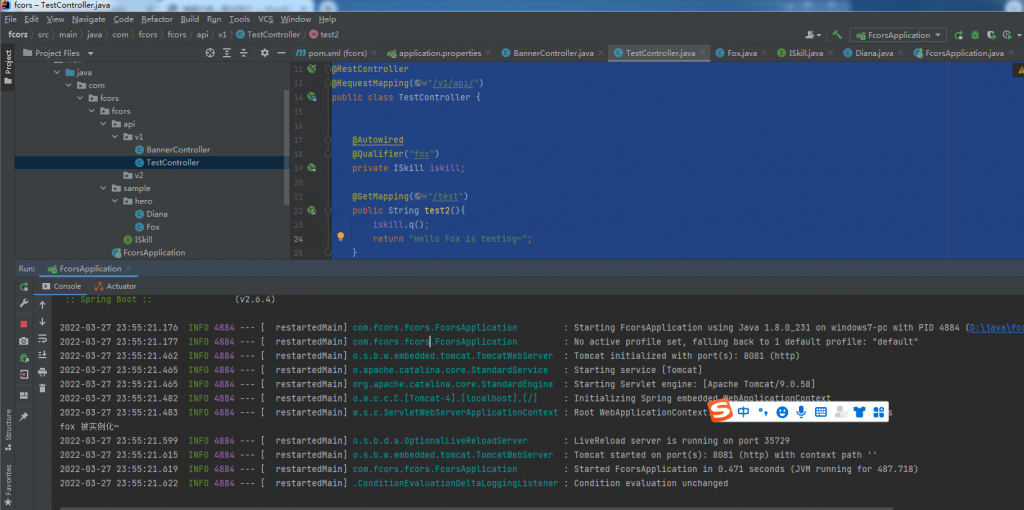
3.2.2、Qualifier(value)
package com.fcors.fcors.api.v1;

import com.fcors.fcors.sample.ISkill;
import com.fcors.fcors.sample.hero.Diana;
import org.springframework.beans.factory.annotation.Autowired;
import org.springframework.beans.factory.annotation.Qualifier;
import org.springframework.context.annotation.Lazy;
import org.springframework.web.bind.annotation.GetMapping;
import org.springframework.web.bind.annotation.RequestMapping;
import org.springframework.web.bind.annotation.RestController;

@RestController
@RequestMapping("/v1/api/")
public class TestController {


    @Autowired
    @Qualifier("fox")
    private ISkill iskill;

    @GetMapping("/test")
    public String test2(){
        iskill.q();
        return "Hello Fox is testing~";
    }
}
综上demo3所得:
@Autowired被动注入方式 : bytype、 byname
首先进行bytype注入,不满足时执行byname注入
- 找不到任何一个bean,会报错。例如接口并没有实现,代码块却引用了
- 只有一个bean,直接注入。例如只有diana实现了接口,则默认注入此bean
- 当有多个bean实现了接口,并不一定会报错,处理按照字段名字推断仍然错误
但该方法并不是最好的方法,因为违反了开闭原则,需要在代码块修改具体的类
下面继续讲解模式注解的configuration
